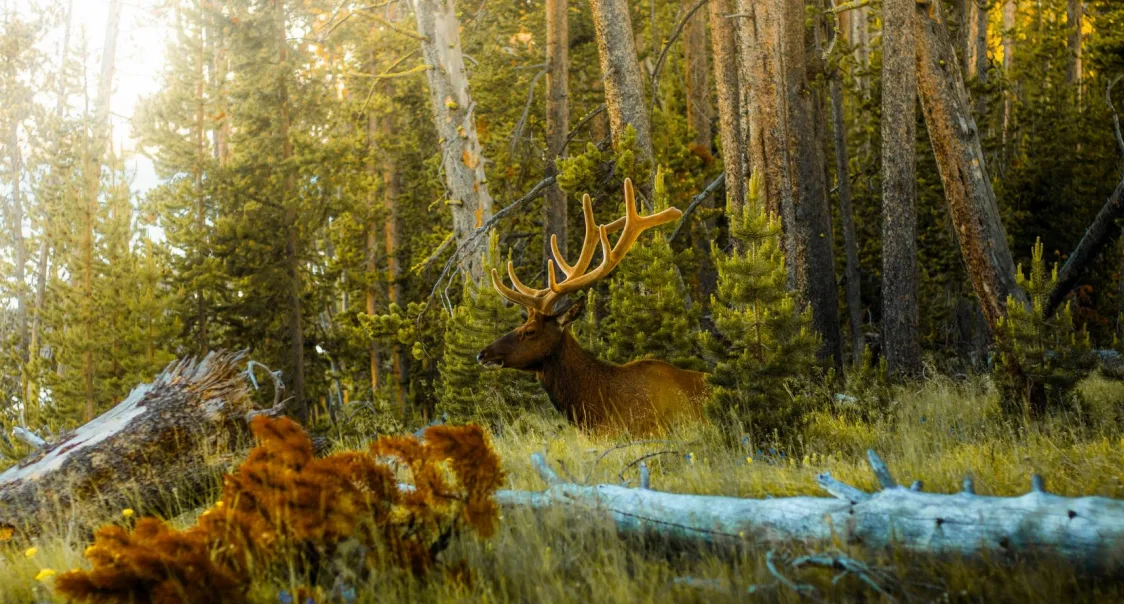
Successful deer hunting comes down to understanding deer behavior, choosing the right gear, and making smart decisions before and during the season.
This guide walks you through every step of deer hunting, from preparing your gear and scouting locations to making an ethical shot and handling your harvest.
You will know how to select the right equipment, hunt successfully within legal limits, and in an ethical way, helping you in a better position to fill your tags and leave a lasting memory in the wild.
Let’s explore what it takes to become a skilled, responsible deer hunter.
Understanding Deer Behavior Before Hunting
Understanding the anatomy of a deer, how deer think, move, and sense their environment is fundamental to hunting success.
The more you know about their biology, the better you can predict their movements and stay undetected.
Diet & Food Preferences
Deer are browsers and grazers that adapt their diet based on seasonal availability throughout the year.
In spring and summer, deer like to eat plants and fruits, like tender green shoots, clover, alfalfa, and crops like soybeans and corn. Fall brings acorns, apples, persimmons, and other mast crops that deer actively seek for fat reserves. Winter forces them to browse on woody stems, twigs, and whatever green vegetation remains available.
Knowing what deer eat in each season helps hunters identify feeding areas, bedding locations, and likely travel routes.
Food sources change dramatically between seasons, so scouting throughout the year reveals shifting deer preferences and habits.
Senses: Smell, Sight, Hearing
A deer’s keen senses are its primary defense against predators, making scent control absolutely critical for hunters.
Their sense of smell is estimated to be up to 1,000 times more sensitive than that of humans.
Always hunt with the wind in your face or crossing, never blowing from you toward the deer. You can use scent-free soaps, detergents, and store hunting clothes in sealed containers to minimize human odor.
Deer see very well in low light and detect movement exceptionally quickly, though they’re colorblind to red. Camouflage breaks up your outline, but staying still is more important than perfect camo patterns.
Their large, rotating ears can pinpoint sounds from hundreds of yards away in any direction. Move slowly and deliberately, avoiding quick motions that trigger their flight response instantly.
Activity Patterns & Sleep
Deer are crepuscular, meaning they’re most active during dawn and dusk when light levels are low. Peak movement typically occurs in the first hour of daylight and the last hour before dark. During midday, deer usually bed down in secure areas with good visibility or thick cover.
Deer usually bed in secure cover during daylight, which is why finding bedding areas is one of the most important parts of scouting.
Pressure from hunting can shift deer to more nocturnal patterns, especially on public land. Moon phases, weather conditions, and the rut can all alter normal activity patterns significantly.
Deer Rut and Best Times to Hunt
Timing is everything in deer hunting, and understanding seasonal changes dramatically improves your success rate.
Each period of the season offers unique opportunities and challenges that smart hunters can exploit. For whitetail hunters, understanding how deer behavior changes throughout the season is one of the biggest keys to success.
Understanding The Deer Rut
The early season runs from opening day through October, when deer follow predictable feeding patterns. Bucks are still in bachelor groups and focused primarily on food sources and water.
Deer’s rutting season occurs in November in most regions. During the period, bucks actively seek does for breeding.
During this peak period, bucks abandon caution and travel extensively throughout the day searching for receptive does. The pre-rut and post-rut phases bookend the peak, with increased but less frantic activity.
Late season, from December through closing day, finds deer stressed and focused on surviving winter conditions.
Understanding these phases helps you adjust tactics, stand locations, and calling strategies for maximum effectiveness.
Best Time of Day to Hunt
Timing matters more than most gear choices, and knowing the best time to hunt deer can dramatically increase success rates.
The first and last hours of daylight consistently produce the most deer sightings and encounters.
Morning hunts work best when deer return from feeding areas to bedding areas at dawn. Set up well before first light to be in position when deer start moving.
Evening hunts catch deer leaving bedding areas and heading toward food sources as darkness approaches. Midday hunting during the rut can be extremely productive as bucks cruise constantly for does.
Wind direction should guide your stand choice more than any other single factor. Bring some milkweed, which can work greatly to help you detect the wind.
All-day sits during peak rut often result in encounters that would be missed otherwise.
Weather & Barometric Pressure Effects
Falling barometric pressure often triggers increased deer movement as they sense approaching weather systems.
Deer feed heavily before major storms, making pre-frontal periods excellent for hunting opportunities. See how deer hunting and barometric pressure influence deer activity.
The weather also plays a huge role in deer hunting. In fact, our study on hunting deer during rainy conditions shows that deer activity actually increases during light drizzles.
Light rain can be advantageous as it dampens sound and masks your scent effectively. Heavy rain, however, typically keeps deer bedded until conditions improve significantly.
Cold fronts following warm periods activate deer movement, especially during the rut phase. Stable high pressure often means reduced daytime activity, particularly on unseasonably warm days.
Wind affects both deer movement and your ability to remain undetected in your stand.
Regional Differences
Deer hunting timing varies considerably across different regions due to climate, latitude, and deer subspecies.
Southern states often have longer seasons with rut periods extending from October through January. Northern states typically see concentrated rut activity in a narrow November window of two weeks.
Western mule deer hunting often peaks in late October through early November at higher elevations. Coastal areas may have different patterns than inland regions, even within the same state.
Local knowledge and scouting are essential since conditions can vary even between neighboring counties.
Deer Hunting Seasons, Regulations & Limits
Deer hunting rules can change a lot from one state to another. Before you head into the woods, check the season dates, legal weapons, license and permit requirements, tagging rules, and bag limits for the area you plan to hunt.
For a state-by-state look at current season schedules and regulations, see our hunting seasons for 50 states guide.
Bag Limits and Antler Restrictions
Bag limits determine how many deer you can legally harvest during a season. The limit may differ between bucks and does, and some states or hunting zones have additional permits or restrictions.
Antler point restrictions require a legal buck to meet a minimum number of points on one side before it can be harvested. These regulations protect young bucks and allow them to mature into older age classes.
Always check the regulations for the specific state, county, hunting zone, and weapon season you plan to hunt. Don’t rely on last year’s dates or rules, since regulations can change from one season to the next.
Season Rules & Restrictions
Most states offer different seasons for archery, firearms, muzzleloaders, youth hunters, or antlerless deer.
The dates and rules vary widely, so there is no single deer season schedule that applies across the country.
Archery seasons typically run longest, often opening in September and running through January or longer. Muzzleloader seasons provide primitive weapon hunters opportunities, usually lasting one to two weeks.
Rifle seasons are often the shortest but most popular, typically running two to four weeks. Youth and mentor hunts often occur on special weekends before regular seasons to encourage participation.
Before hunting, make sure you know when your season opens and closes, which weapons are legal, whether you need special permits or tags, and whether there are any restrictions on the deer you can harvest.
Essential Deer Hunting Gear & Clothing
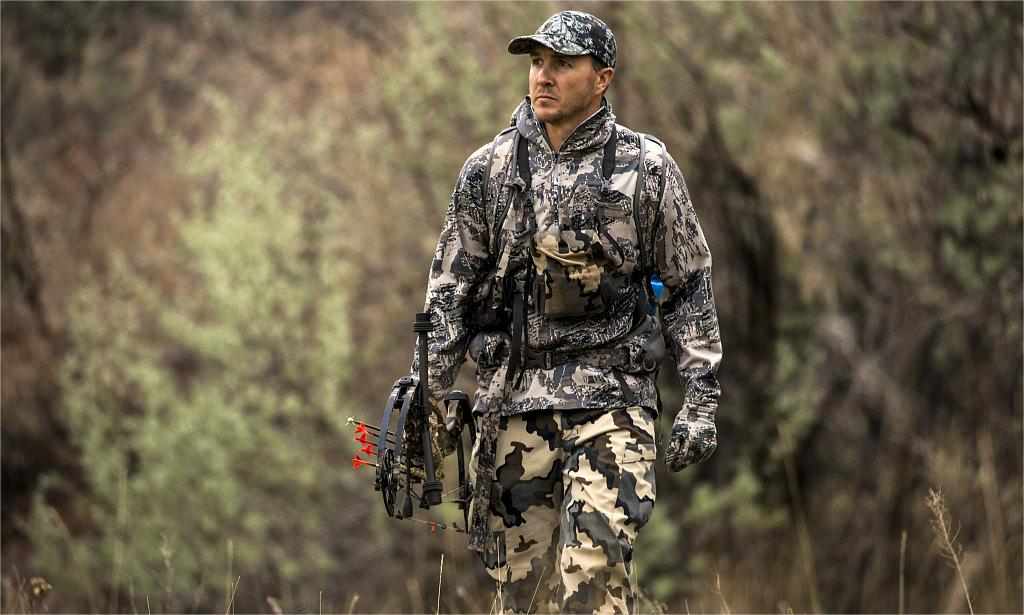
Proper gear and clothing can make the difference between comfort and misery in the field. More importantly, the right equipment keeps you safe, concealed, and prepared for various seasons and conditions.
Clothing Layers & Camouflage Basics
Layering allows you to adjust for temperature changes throughout the day and between locations. Start with moisture-wicking base layers that pull sweat away from your skin to prevent chilling.
Add insulating hunting base layers, like fleece or wool that retain warmth even when damp. Top with a quiet, windproof, waterproof outer shell that doesn’t rustle with every movement.
Camouflage patterns should match the environment you’re hunting, whether hardwoods, evergreens, or agricultural areas. Avoid wearing blue and white, as deer can distinguish these colors more clearly.
Always remember that the best camouflage pattern matters less than staying still and playing the wind correctly.
Hunter orange is required by law in most states during rifle seasons for safety. Always check your state’s specific requirements regarding orange vest and hat regulations before hunting.
Boots, Scent Control & Accessories
Choosing the right deer hunting boots with good ankle support prevents blisters, twisted ankles, and cold, wet feet.
Insulated boots rated for the coldest temperatures you’ll encounter keep you in the stand longer. Rubber boots minimize scent trails when walking to and from your hunting location.
Scent control includes sprays, scent-eliminating clothing, and carbon-activated garments that trap odor molecules.
Pack rain gear, extra socks, hand warmers, and a cushion for extended sits. Gloves should be quiet, warm, and thin enough to allow trigger or string control.
A quality headlamp with a red light setting helps you navigate in darkness without spooking deer.
Optics, Calls & Ground Blinds
Binoculars help you identify deer at a distance and spot movement in thick cover. Quality optics with 8x or 10x magnification and good low-light performance are worth the investment.
Rangefinders give precise distances for ethical shot placement and eliminate guesswork on range.
Trail cameras provide invaluable data on deer movement patterns, timing, and population in your area. Grunt calls, bleat calls, and rattling antlers can attract deer during the rut period.
Last, tree stands and deer hunting blinds are two of the most common ways for deer hunters to offer concealment, weather protection, and comfortable shooting positions. Set up blinds well before the season, so deer become accustomed to their presence.
Choosing the Right Deer Hunting Weapon
Choosing the right weapon and understanding shot placement are critical for ethical, effective deer hunting.
Your equipment should match your hunting style, terrain, and personal skill level. Always follow your state’s regulations because legal weapons vary by location.
Choosing Caliber or Bow Setup
Common deer hunting calibers include .243, .270, .308, and .30-06, but the best choice depends on your hunting location, rifle setup, and personal comfort.
Magnums like .300 Win Mag are overkill for deer and create unnecessary recoil. Very small calibers like .223 Remington lack sufficient energy for ethical deer hunting in most situations.
Bow hunters should choose draw weights they can comfortably pull and hold for extended periods. Compound bows between 50-70 pounds and crossbows over 125 pounds work well for deer.
Broadheads should be razor-sharp with cutting diameters of at least one inch for adequate wound channels.
Practice extensively with your chosen weapon to ensure consistent, accurate shot placement under pressure.
Shot Placement & Ethics
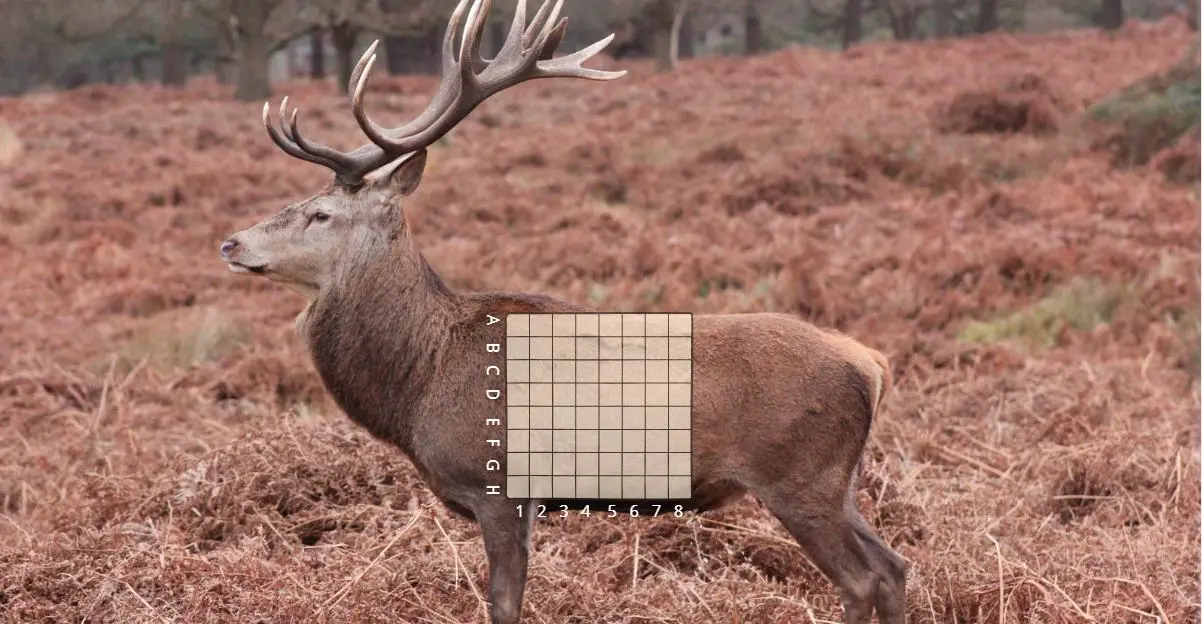
The vital zone would be the heart and lungs (D3 or E3), which offer the largest target area for quick, humane kills. Broadside shots provide the best opportunity, with the aim point just behind the front shoulder.
Quartering-away angles are acceptable, aiming to drive the projectile through the vitals toward the opposite shoulder. Avoid head, neck, and frontal shots as they offer small targets with little margin for error.
High shoulder shots can be effective but may damage excessive meat and require precise placement. Gut shots and hindquarter hits are unethical and often result in lost, suffering animals.
You should wait for clear, high-percentage shots and pass on questionable opportunities regardless of antler size.
Know your effective range and never attempt shots beyond your proven accuracy and equipment capability.
Legal Restrictions & Safety
Many states regulate minimum calibers or cartridges for deer hunting during rifle seasons. Some states prohibit rifles entirely and allow only shotguns, muzzleloaders, or archery equipment.
Check zone maps and your state’s regulations carefully before hunting, as violations can result in fines and license suspension. Always positively identify your target and what lies beyond before pulling the trigger.
Follow the hunter orange requirements during gun seasons and know when other hunters share the woods. Most states require at least 250-500 square inches of blaze orange on the head, chest, and back, while some states allow pink color.
Never shoot at sounds or movement without clearly seeing the entire deer first. Unload firearms when climbing stands, crossing fences, or riding in vehicles per safety regulations.
Tree stand falls cause more injuries than firearms, so always use tree stand safety equipment and keep yourself attached to the tree at all times.
Treat every firearm as if loaded and keep the muzzle pointed in a safe direction. Establish safe shooting lanes and know your maximum ethical range before deer appear in front of you.
Scouting, Finding and Calling Deer
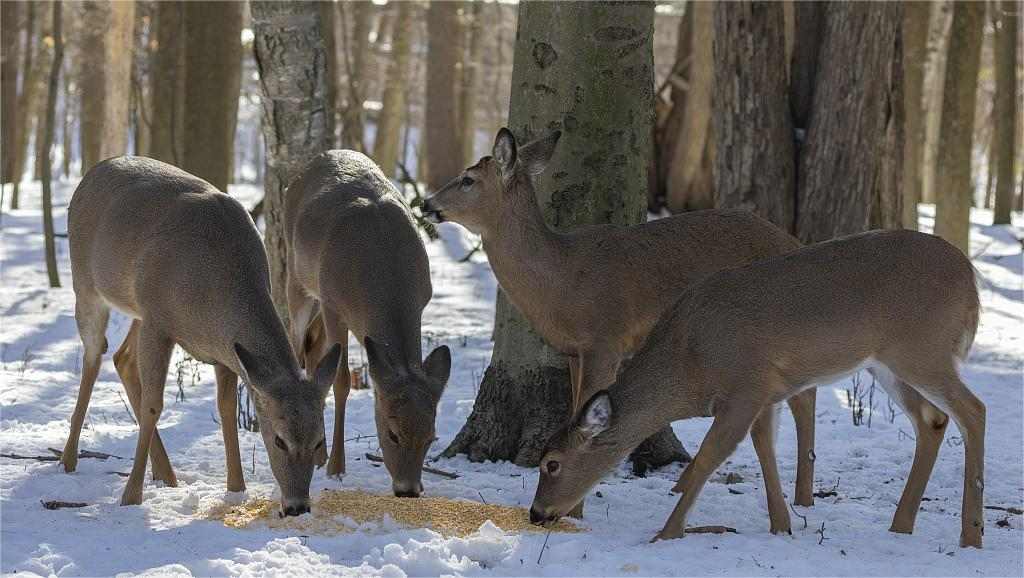
Good deer hunting starts before opening day. Scouting helps you find fresh sign, understand how deer use the area, and choose a stand location before the season gets busy.
Deer Scouting Basics
To find a good spot for hunting, begin summer deer scouting before the season to identify deer movement patterns without disturbing them.
You can look for rubs on trees where bucks scrape bark with their antlers to mark territory. Scrapes are pawed-out areas under overhanging branches where bucks leave scent from glands.
Fresh tracks in soft soil or snow reveal size, direction of travel, and timing. Trails connecting bedding areas to food sources are prime stand locations, especially with fresh sign. Bedding areas in thick cover or on ridges with good visibility need careful, limited scouting.
Creating mock scrapes with proper scent can attract bucks and establish new breeding areas. Trail cameras at scrapes, rubs, and trail intersections provide data on specific deer and movement.
Reading Deer Sign and Movement
Tracking before the shot is really part of scouting. Fresh tracks, rubs, scrapes, trails, and other sign can show how deer are using an area.
Tracks with sharp edges and moist soil are generally newer than tracks with dry, crumbled edges.
Look for trails that connect bedding areas with food sources, especially where cover and terrain naturally funnel deer movement.
Creek crossings, fence gaps, ridge saddles, and other pinch points can concentrate deer traffic and make good places to set up.
Wind matters, too. A trail that looks perfect on a map may not be worth hunting if your scent blows toward where deer are coming from. Check your likely setup from different wind directions before settling on a stand location.
Trail Cameras & Patterning
Trail cameras can help you learn how deer use an area without having to sit in the woods every day. Place cameras along trails, near scrapes, food sources, or water to see which deer are using the property and when they are moving.
Check cameras as sparingly as practical, especially once the season starts. Time-stamped photos can show when bucks are moving during daylight, which trails they prefer, and whether their patterns change as hunting pressure builds.
Don’t expect a buck to follow the same routine all season. Weather, hunting pressure, changing food sources, and the rut can all change deer movement.
Use camera data together with what you see on the ground, and move a stand or change your hunting time when the pattern tells you to.
Calling Techniques
Grunt calls imitate buck vocalizations and can attract curious or aggressive bucks during the rut. Short, soft grunts work well early season, while louder, aggressive grunts fit the peak rut.
Doe bleats attract bucks searching for receptive does and can bring in does as well. Fawn distress calls occasionally work, but can attract predators more often than deer.
Rattling antlers together simulates bucks fighting and can draw dominant bucks seeking competition. Rattling works best during pre-rut and peak rut when bucks are most aggressive.
Call sparingly and wait 20-30 minutes between sequences to avoid sounding unnatural or alarming deer. Calling works better in areas with good buck-to-doe ratios where competition exists naturally.
Attractants, Salt Licks & Legal Notes
Deer attractants can include food, minerals, scents, and other products designed to draw deer into an area.
Some hunters use food plots or mineral sites to attract deer, while scent-based products may be used to make a stand location more appealing during the rut. Their effectiveness can vary with deer behavior, hunting pressure, and the conditions in the area.
Before using any bait or attractant, check the current regulations for the state and hunting area where you plan to hunt.
Rules can vary widely, and some states or areas restrict or prohibit bait, mineral sites, feeding, or certain types of scents. Do not assume that a product is legal simply because it is sold for hunting.
For most hunters, attractants should be viewed as a supplement to good scouting rather than a replacement for it. Finding food sources, bedding areas, travel routes, and fresh deer sign is still the foundation of a productive hunting setup.
Tracking and Recovering a Deer
Finding a deer after the shot starts with patience. Before leaving your stand, take a moment to watch the deer and remember where you last saw it.
If the deer runs out of sight, mark the spot where you last saw it and the location of the shot before starting to track.
What to Do After the Shot
Finding a deer after the shot starts with patience. If you are not sure about the hit, don’t rush after the deer.
Before leaving your stand, take a moment to watch the deer and remember where you last saw it. Pay attention to how it reacts, which direction it takes, and whether it slows down or beds down.
If the deer runs out of sight, mark the spot where you last saw it and where you took the shot. Don’t rush after it. If you are not sure of the hit, giving the deer some time can make recovery easier.
Look for blood, hair, and other sign around the impact site. Bright, bubbly blood can point to a lung hit, while darker blood may suggest a liver or muscle hit. Hair can also offer clues about the hit, but don’t rely on one sign alone when deciding how to track the deer.
When you find the deer, approach carefully and make sure it is down before getting close. Remember to tag the deer according to your state’s regulations before moving or field dressing.
Following the Blood Trail
When you start tracking, look for more than blood. Hair, tracks, broken branches, disturbed leaves, and other signs can help you follow the deer’s path.
Blood can also give you clues about the hit, but a light or disappearing blood trail does not always mean the deer went far.
Move slowly and check the trail carefully before taking another step. If you lose the blood trail, go back to the last place where you found a clear sign and search the area around it.
Look ahead for places where the deer may have turned, stopped, or bedded down.
Recovering Your Deer
Once you find the deer, approach carefully and make sure it is down before getting close. Follow your state’s tagging and reporting requirements, then field dress the deer as soon as practical to protect the meat and make it easier to transport.
If you are new to field dressing, our field dressing a deer guide walks through the process step by step.
Field Dressing, Transport & Venison Care
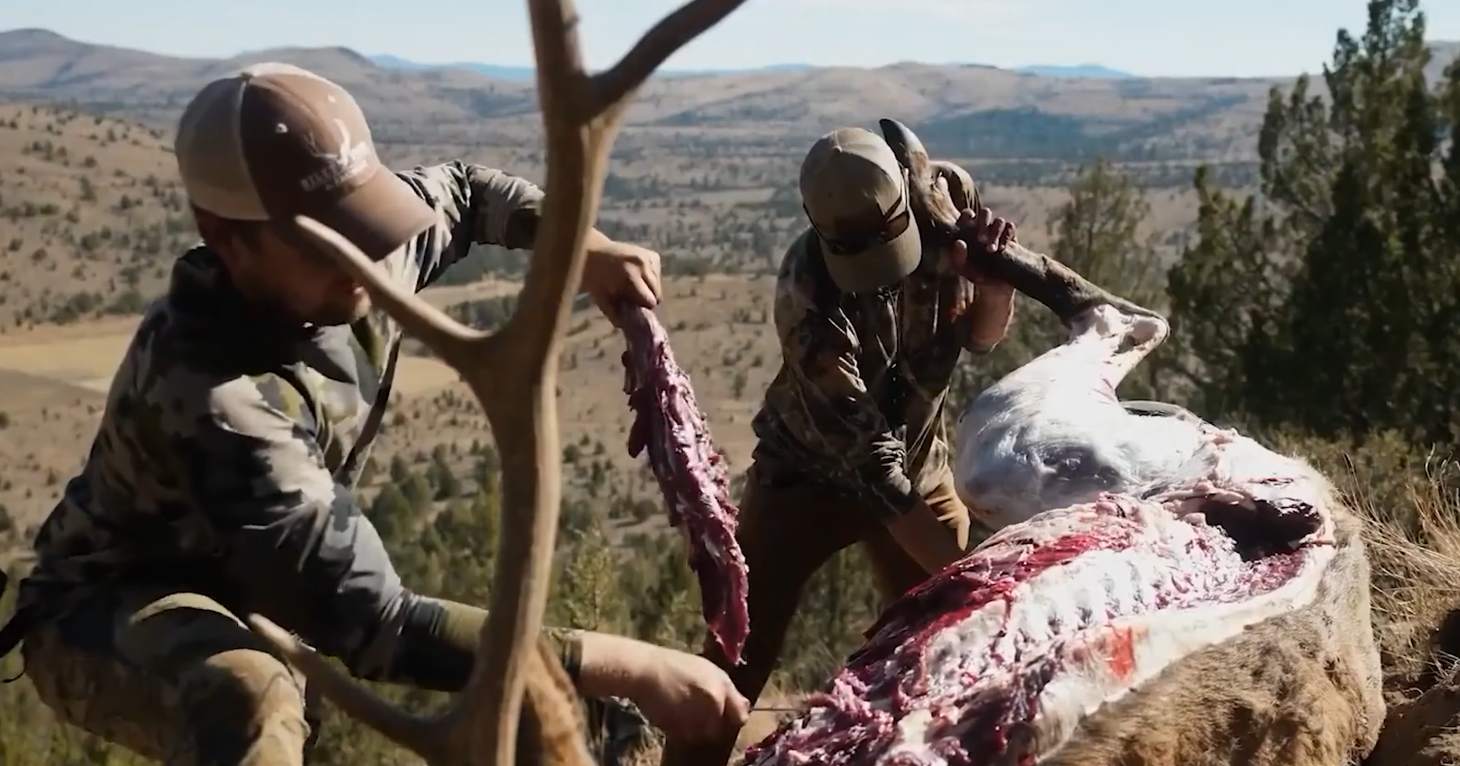
Proper handling of your harvest ensures the highest quality meat and shows respect for the animal. Quick, clean field dressing is essential for preventing spoilage and preserving the venison’s flavor.
Deer Field Dressing & Quartering
Once a deer is harvested, knowing what to do after harvesting a deer ensures meat quality and legal compliance.
Field dressing the deer as soon as practical helps remove the internal heat and protect the meat, especially in warmer weather. Work carefully with a sharp knife and avoid cutting into the stomach or intestines.
The basic process is to open the body cavity, remove the internal organs, and allow the carcass to cool. Keep dirt, hair, leaves, and other debris away from the meat.
If the weather is warm or you have a long way to pack the deer out, quartering can make the carcass easier to cool and transport, thus preventing bacterial growth and meat spoilage within hours.
Transporting & Sharing Deer Meat
A simple way to drag a deer out of the woods is to use a rope harness or a specialized deer cart on wheels.
You can use a game bag to keep the body cavity clean and free from dirt, leaves, and debris during transport. Later, hang the deer in a cool, dry place or get it to a processor within hours.
Most states allow giving away deer meat without special permits or licenses. Some states require proper tagging and documentation when transporting or gifting deer meat to others.
Never sell wild game meat, as this is illegal in all states without special licensing. Process the deer yourself or use a reputable processor who follows proper handling and sanitation.
Storage & Venison Care
Once the deer is home, cool the meat promptly and package it well before freezing.
Vacuum-sealed, meal-sized portions are convenient for long-term storage, and labeling each package with the cut and date makes it easier to use older meat first.
Fresh venison can keep 3-5 days refrigerated. Properly packaged deer meat lasts 9-12 months in a freezer set at 0°F or below. Freezer-burned meat is safe but may have off flavors or a dry texture when cooked.
Spoiled deer meat has a sour smell, slimy texture, or grayish-green color, indicating bacterial growth. When in doubt about meat safety, throw it out rather than risk foodborne illness. Remove all fat and silver skin before cooking, as deer fat turns rancid quickly.
For more details on storage times and freezing, see our guide on how long venison lasts in the freezer.
Antlers, Scoring & Mounts
For many hunters, a buck’s antlers are part of the story of the hunt. You don’t need to be a scoring expert to appreciate a rack, but knowing the basics can help you count points, compare bucks, and decide how you want to preserve a memorable harvest.
Counting Points & Scoring Basics

A point must be at least one inch long to count officially in most scoring systems. When counting points on a deer, you should count all points projecting from both main beams.
The Boone and Crockett Club and Pope and Young Club maintain well-known record books for whitetail deer. Gross score measures the rack before deductions, while net score accounts for differences between the two sides. For example, if the right G2 tine measures 10 inches and the left measures 8 inches, you subtract 2 inches.
Measurements can include main beam length, tine length, circumference, and inside spread.
Some bucks have unusual features such as drop tines, sticker points, kickers, or other non-typical points. These can affect how a rack is classified and scored, but you don’t need to know every scoring detail to judge a buck in the field.
Inside spread credit cannot exceed the longer main beam length in typical scoring categories. Official scoring requires a 60-day drying period before final measurements can be recorded.
Green scores taken immediately after harvest typically shrink 2-3 inches during the drying period as moisture evaporates. Most hunters care more about the experience and meat than official scores and records.
Mounting Options & Cost
If the buck is a memorable one, you may want to preserve the antlers or have the deer mounted.
A shoulder mount gives you the most lifelike display, while a European mount keeps the skull and antlers and has a simpler look. An antler plaque is another option if you only want to display the rack.
Whichever option you choose, look at a taxidermist’s previous work before making a decision. Good photos and references can tell you much more than a low price alone.
Conclusion
This comprehensive guide provides a foundation for understanding deer hunting from multiple aspects and perspectives. Whether you’re preparing for your first hunt or looking to improve your success rate, knowledge is power.
Remember that becoming a skilled deer hunter takes time, patience, and continuous learning from experience. Always hunt ethically, follow all regulations, and respect the land and animals you pursue.
Good luck in the field, and may your hunts be safe, successful, and memorable. If you have any successful tips and stories, come and share them with us!